Your Mac comes with everything you need to take screenshots. There are easy ways to take How to take a screenshot on a mac entire screen, a section of your screen, or even a specific window.
The problem: these features are hidden behind keyboard shortcuts that, to say the least, isn’t obvious.
Screenshot tools for Mac have always been easy to use, yet somewhat rudimentary. You could capture just about anything if you knew the right keyboard shortcuts, but you had to know what you were doing first. Since the release of Mojave, macOS now has a built-in screenshot tool—similar to what you might find in Windows—that allows you to take screen grabs with the click of a button. Here’s how to capture what’s on your screen.
Keyboard shortcuts for Mac screenshots

To take screenshots on any Mac, you’ll need to memorize a few keyboard shortcuts. Fortunately, they’re all quite similar—and each saves a screenshot image to your Mac’s desktop by default. Here are the default Mac screenshot keyboard shortcuts:
-
Save full-screen screenshot:
Command+Shift+3 -
Save screenshot of single window:
Command+Shift+4, press theSpacekey, then click on the window you want to capture -
Save screenshot of single window without shadow:
Command+Shift+4, press theSpacekey, then hold theAltkey and click on the window you want to capture -
Save screenshot of selection:
Command+Shift+4, then select the area you want to capture with your mouse cursor. -
Save screenshot of Touch Bar:
Command+Shift+6
Tip: Want to copy the screenshot to your clipboard instead of saving it to your desktop? Add
Ctrlto any of these keyboard shortcuts to copy the screenshot—so, for example,CMD+Ctrl+Shift+3to copy a full-screen screenshot.
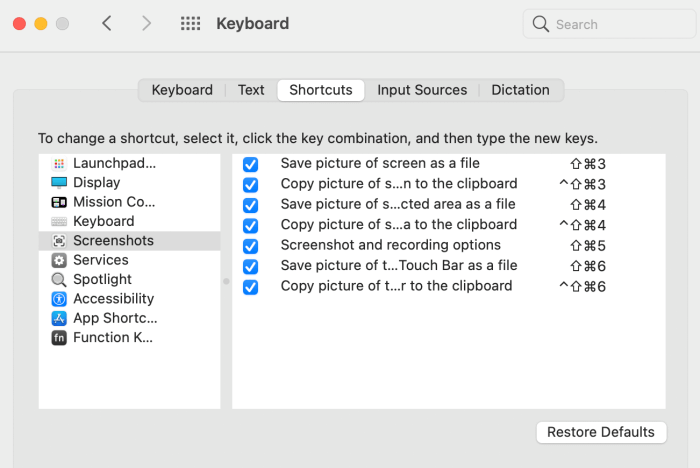
If you want, you can customize the screenshot keyboard shortcuts from your Mac’s keyboard preferences. Open your System Preferences, select Keyboard, then click the Shortcuts tab and select Screenshots on the left side. There you can customize any of the default shortcuts for screenshots.
How to capture delayed screenshots and videos using the Screenshot app
Want to capture your mouse with your screenshots—or capture a screenshot after a delay? The built-in Screenshot app can do that, and you’ll find it in the Other folder in Launchpad or the Applications > Utilities folder in Finder.
Open Screenshot, then click Options to set up a delay. You can also use the buttons to choose between the entire screen, a particular window, or a region of the screen.
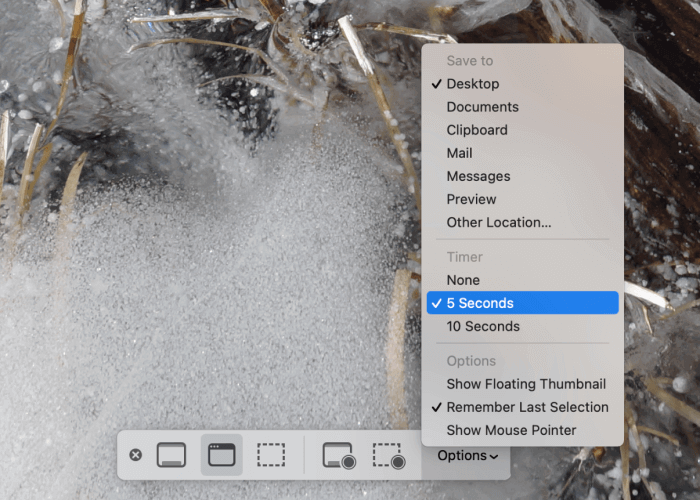
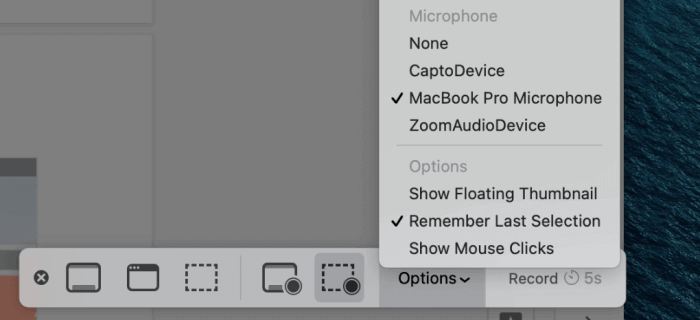
The buttons with the small circles on them let you record a video of your screen—you can even record commentary using your microphone. You can do your entire screen or a particular section—the result will be saved as a .MOV file to your desktop.
How to take screenshots using the MacBook Pro Touch Bar
If you have a newer MacBook Pro with a Touch Bar, you won’t have to remember keyboard shortcuts each time you take screenshots. Instead, you can add a camera icon to your Touch Bar and save anything as a screenshot with a couple taps.
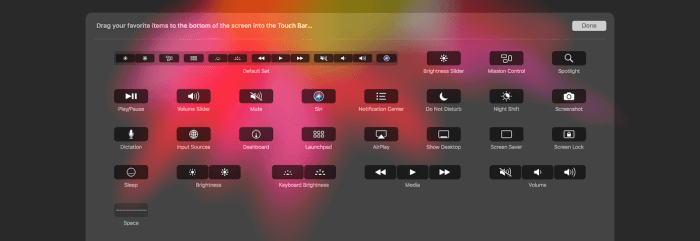
First, open your Keyboard preferences and click the Customize Control Strip… button in the bottom of the window. That will show all the options you can use on your Touch Bar. Click and drag the camera icon to your Touch Bar, then save the changes to always have a one-tap way to capture anything on your screen.

As soon as you tap the camera button on your Touch Bar, your mouse cursor will switch to crosshairs to select any part of your screen to save as a screenshot. Press the spacebar on your keyboard then click a window to save a full window screenshot. Or, select any of the other screenshot options that show on the Touch Bar while taking a screenshot to take a full-screen screenshot, copy the image instead of saving it as a file, and more.
Tip: Need to take a screenshot of your Touch Bar? Press CMD+Shift+6 to save a screenshot of your full Touch Bar to your desktop.
To review: CMD+Shift+3 to screenshot your full screen. CMD+Shift+4 for just a section—or tap space to capture a window.