
Introduction
Mobile applications, or commonly called Apps, have gained popularity with the increasing demand and smartphone usage. We have applications for almost everything and heavily rely on them for our daily life. You can be a creative thinker or a college student who has an idea that he/she wishes to make into an app, right? You even can develop the App and get started as a beginner.
What are the platforms?
You all must be aware that the two majorly used mobile platforms are Android and iOS. Android is the mobile operating system developed by Google and used in most smartphones, whereas iOS is the mobile operating system developed by Apple that you use in your iPhones.
Based on the operating system, the application development takes place in either of the two ways:
A. Native Application Development
Native applications are the apps that are developed for their native operating environment. A particular platform adopts the programming language used. Java is the programming language for android app development, whereas Objective-C and Swift are the languages for iOS app development. Native has its own set of advantages such as flexibility and more freedom with native tools at use. The App is stable, fast and scalable.
The apps nowadays need to be compatible with both platforms. Herewith the use of native development, two different teams need to work on the same application to make them for respective platforms. It can prove to have cost heavy and more time investment requirement. This brings us to the need for cross-platform development.
B. Cross-Platform application development
Here you have the same code base for both platforms. Cross-platform apps utilise a shared operating environment for development. It is cost-efficient but at the same time challenging since it is difficult to target multiple OS at the same time. Cross-platform frameworks play a significant role to make the applications compatible with the different operating systems.
Cross-platform applications are slower in general when compared to native applications. The problem with cross-platform arises when you use multiple smartphone functionalities such as camera, voice control, microphones and modes. They are challenging to streamline since different OS have different configurations for individual features.
Now, you can choose tools and technologies that support the development in either of the modes. It can largely depend upon your career perspective and current skill level.
Now, to get started with your app development, you will need to follow the below steps:
1. Environment Setup
You can choose from a variety of platforms for Android and iOS development. You can opt from various frameworks or decide to develop the native application using Java and C#.
Android Development
You can visit the official website of Android to read and explore more about Android.
You can choose the language of your preference to start your development. Kotlin is a comparatively new language, but it has been adopted as the official “first-class” language for Android development in 2017. If you are just getting started, you can begin with Kotlin, which most companies prefer for Android application development.
The editor or the IDE you require to develop an android application is Android Studio. You are required to download and set up your android studio to use emulators for simulation, analyse APK, test and debug your apps. You can download an android studio for your operating systems such as Windows, macOS or Linux.

iOS development
Swift is a general-purpose language developed by apple. The other options you have among iOS application development languages is C# and .net. You will require a macOS operating system and Xcode IDE installed to get started with your development with swift.
Xamarin
In case you are using C# and .Net, you can use the Xamarin IDE. Xamarin is a cross-platform application development environment by Microsoft. The best feature of Xamarin is a cross-platform application development environment; the apps built have performance and speed like native applications.
Cross-Platform App Development
Flutter
If you are in the Android development field already, you must have heard the buzz around Flutter. Flutter is a UI development kit developed by Google, and it uses Dart language for its development. It has a fast learning curve and creates beautiful UI widgets. You can build desktop, mobile and web applications with a single codebase that too with native-like performance.
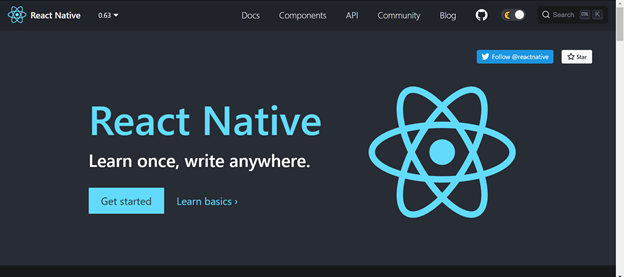
React Native
Are you a javascript developer and thinking of developing android apps? There is something in store for you too! You can develop android, iOS and web applications with a single codebase in react. React is the UI library based on javascript. It was developed by the team at Facebook and is the second most popular framework after Flutter.
1.Where to learn?
The best resource to get started with any technology is to refer to the official documentation. You will get all the instructions from installation to building components by the officials who developed the tool and technology. Later you have google and youtube at your disposal to check around free resources. You can even take dedicated
courses to accelerate your learning and have a sense of completion. You can take the Coding Ninjas Android developer track to learn android development with Kotlin along with complete projects. If you are looking for job assistance and mock interview sessions and your Android development skills ready, you can opt for the Premium Android development Track.
2.App Ideation and Planning
Any app starts with an idea. You can be participating in a hackathon or trying to crack some real-world problem. Ideation and Planning are essential steps here. You should be aware of what you can do with your current skill set and what you will require to learn. It comes after you practice more and read about the technology and its features. It will help you bring your ideas to reality.
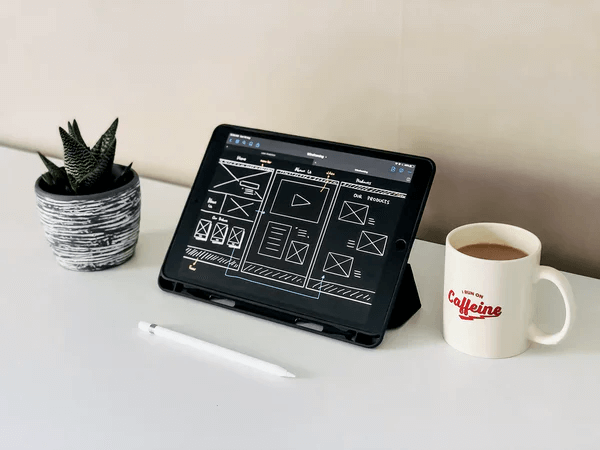
3.Wireframing
Wireframes are the skeletal design of the application you are building. It helps you figure details, flow and placement of widgets in the application. It is not a complete design but a rough idea sketch to give structure to your App. You can use software such as Framer, Adobe XD and Figma to prepare your wireframe. It is essential to work on user experience (UX).
4.Graphic Designing
Graphics are yet another critical component of a visually stunning app. You might have seen the applications where everything is cohesive, from colour schemes to the design of buttons, icons, logo and images. This is what graphic designing comprises for App development. You can learn graphic designing or collaborate with a designer friend if you cannot be so good at designing. Some of the popular graphic designing software are Adobe capture CC, Sketchbook and Artflow.
5.Coding
Firstly you should make yourself comfortable with whichever language you are coding. There are various practices in coding an application. You can make it alone in case it’s a small application. You can pair program with your friend and learn together. When there is a big project, it is essential to know about specific software development methodologies to make your development streamlined and not chaotic. Agile is a recent practice where you make the application in smaller cycles on discussion and Planning. It helps you set realistic expectations and faster development.
6.Publish
Once the application is ready with all the code base and tests are done, you can publish it on any of your platforms, such as the apple store or google play store. You can refer to the documentation to post your application on Playstore. You can submit your App similarly to the apple store.
Let’s get started with some real building of App using Flutter. I have been learning Flutter and have had really excellent experience building projects for hackathons and projects. You can also build your first flutter app.
Steps to create an App
1. Installation
It is the most crucial process. Install Flutter from here. Don’t forget to add Flutter “path” in the control panel.
Once the installation is complete, the second step is creating a project.
2. Create a project
I prefer VS code, so you will see how to create a Flutter project in VS Code.
.
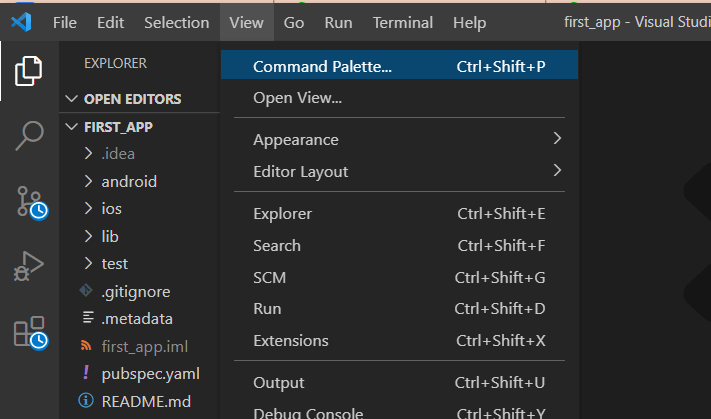
Go to View-> Command Palette. If the Flutter installation was successful, you should see something like this on clicking command palette –
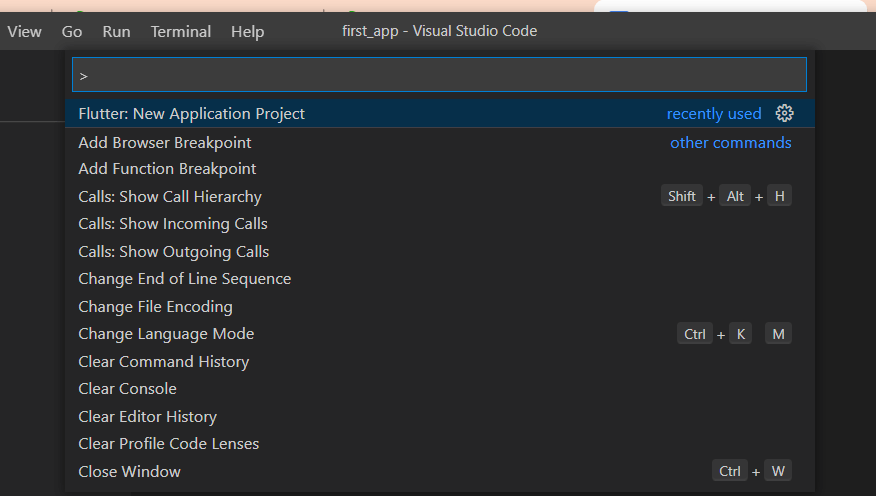
Now, click on Flutter: New Application Project, save your project wherever you want. Give a meaningful name to your project. I have given first_app here.
Now, you are ready to code in Flutter.
3. Coding
It is the most critical part of any application development process. As a beginner, you can ignore the high definition code. But once you start writing more and more code, you will get to know the correct way of writing high-quality code.
Some features that we are going to include in this App are –
- AppBar
- Images
First, remove the unnecessary code in main.dart. After removing, it should look like this –
import 'package:flutter/material.dart';

void main() {

  runApp(MyApp());

}

class MyApp extends StatelessWidget {

  @override

  Widget build(BuildContext context) {

    return MaterialApp(

      title: 'Flutter Demo',

      theme: ThemeData(

        primarySwatch: Colors.blue,

        visualDensity: VisualDensity.adaptivePlatformDensity,

      ),

      home: MyHomePage(),

    );

  }

}
We will first create a MyHomePage class. Then, inside it will make an appbar with the name which we want to give to our App.
class MyHomePage extends StatelessWidget{
  @override
  Widget build(BuildContext context){
    return Scaffold();
  }
}
After creating the class, we will write every widget inside the Scaffold widget.
“In Flutter, Everything is a Widget.”
Now, let’s create an appBar.
class MyHomePage extends StatelessWidget {
  @override
  Widget build(BuildContext context) {
    return Scaffold(
      appBar: AppBar(
        title: Text("First App")

        )
       );
  }
}
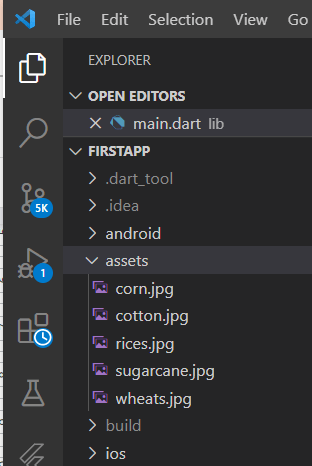
Now, create a folder “assets” and add some images to it like this –
Now, we will create a listview of images on our main page. But before that, add the “assets” folder to pubsec.yaml file.
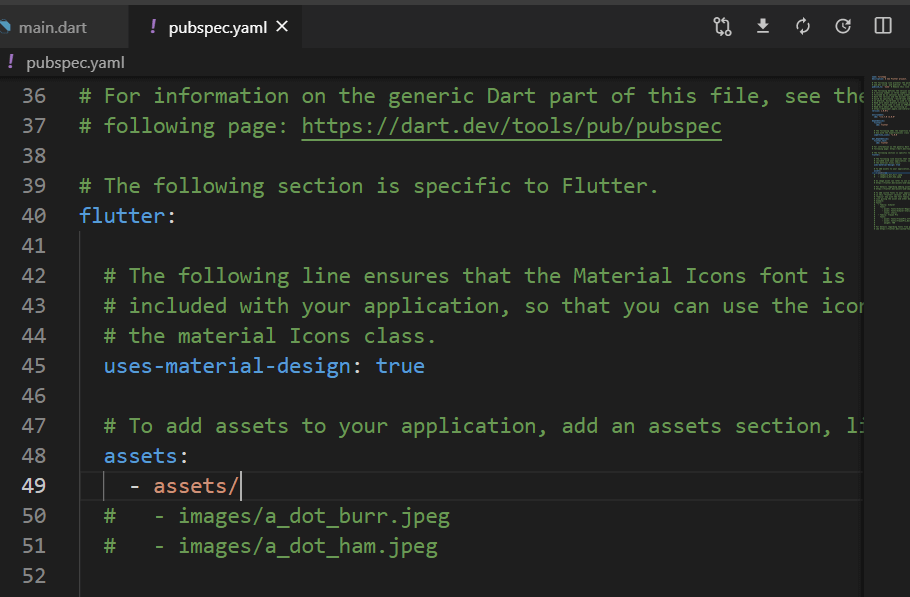
It will include all the content of the asset folder in our App. Do “Ctrl + S” or click the download icon in pubspec.yaml file to download all the dependencies on which our App depends. Otherwise, it will throw an error.
List imageList = [
    "assets/corn.jpg",
  "assets/cotton.jpg",
    "assets/rice.jpg",
 "assets/sugarcane.jpg",
    "assets/wheats.jpg"
];
Create an imageList variable to store all the images we are going to use.
import 'package:flutter/material.dart';

void main() {

  runApp(MyApp());

}

class MyApp extends StatelessWidget {

  @override

  Widget build(BuildContext context) {

    return MaterialApp(

      title: 'Flutter Demo',

      theme: ThemeData(

        primarySwatch: Colors.blue,

        visualDensity: VisualDensity.adaptivePlatformDensity,

      ),

      home: MyHomePage(),

    );

  }

}

class MyHomePage extends StatelessWidget {

  List imageList = [

    "assets/corn.jpg",

    "assets/cotton.jpg",

    "assets/rice.jpg",

    "assets/sugarcane.jpg",

    "assets/wheats.jpg"

  ];

  @override

  Widget build(BuildContext context) {

    return Scaffold(

      appBar: AppBar(title: Text("First App")),

      body: ListView.builder(

        itemCount: imageList.length,

        itemBuilder: (context, index) {

          return Container(

            child: Image.asset(imageList[index]),

            height: 500,

            width: 500,

          );

        },

      ),

    );

  }

}
We have used ListView.builder, to make code shorter and look elegant. Since it uses the index we created imageList. The itemCount specifies the number of items we want to show on screen and itemBuilder builds the widget which we select inside it. Here, we created a ‘Container’ with Image as a child and specified its height and width to avoid pixel overflow.
Congratulations, you coded your first App.
You can have a deeper look at the widgets we used in the code –
1. Scaffold
2. AppBar
3. MaterialApp
4. ListView
5. Container
6. Image and Asset
7. Text
4. Testing
We are done with the coding part. Now, how to know how our App exactly looks? We will know this by running our App on an emulator.
Emulators are designed to simulate other devices. To run our App, we will create a flutter emulator like this –
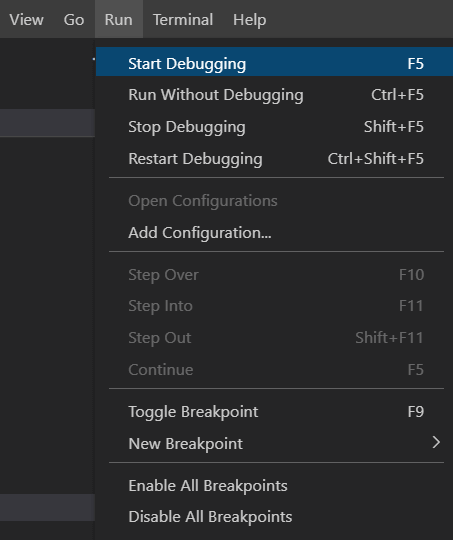
After clicking Start debugging, you will see all the emulators installed on your device like this –

As you are debugging for the first time, click on “Create Android Emulator” to create an android device for your testing.
After some time, you should see this in VS code debug console –

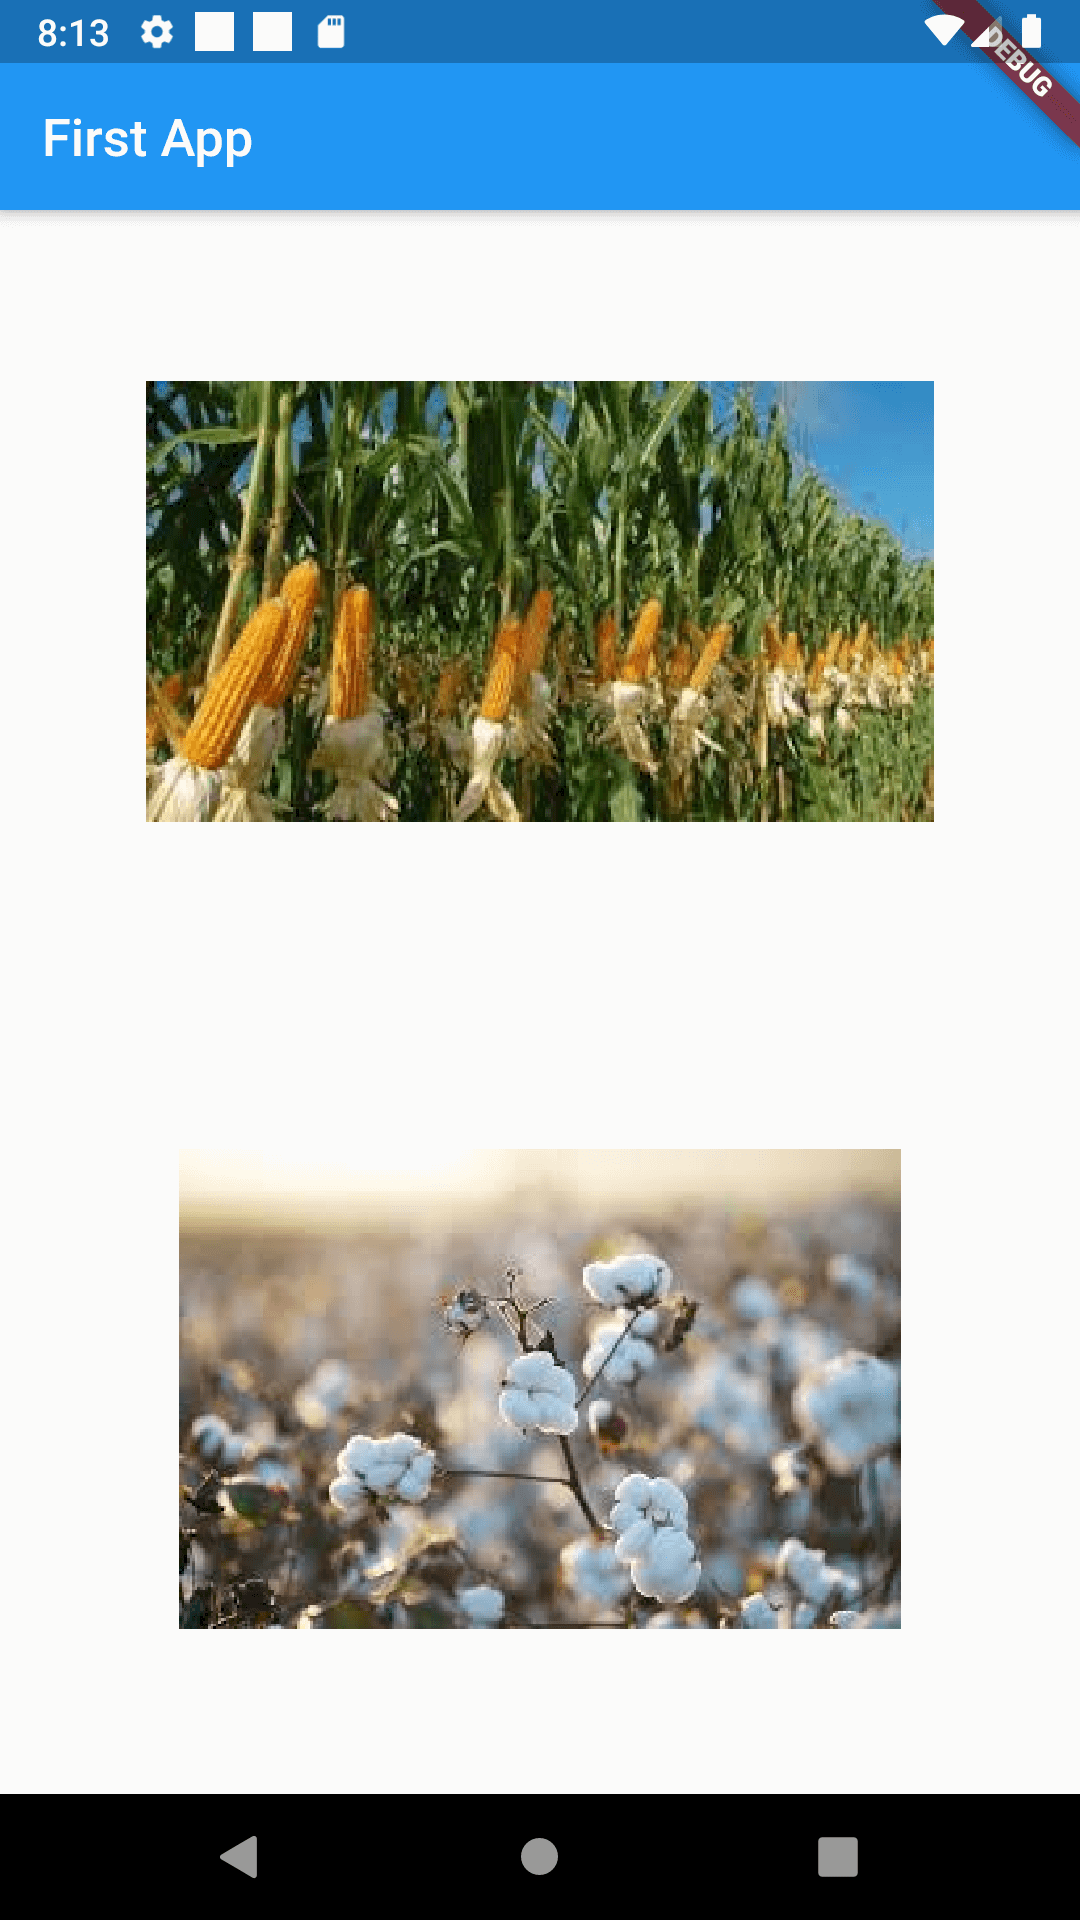
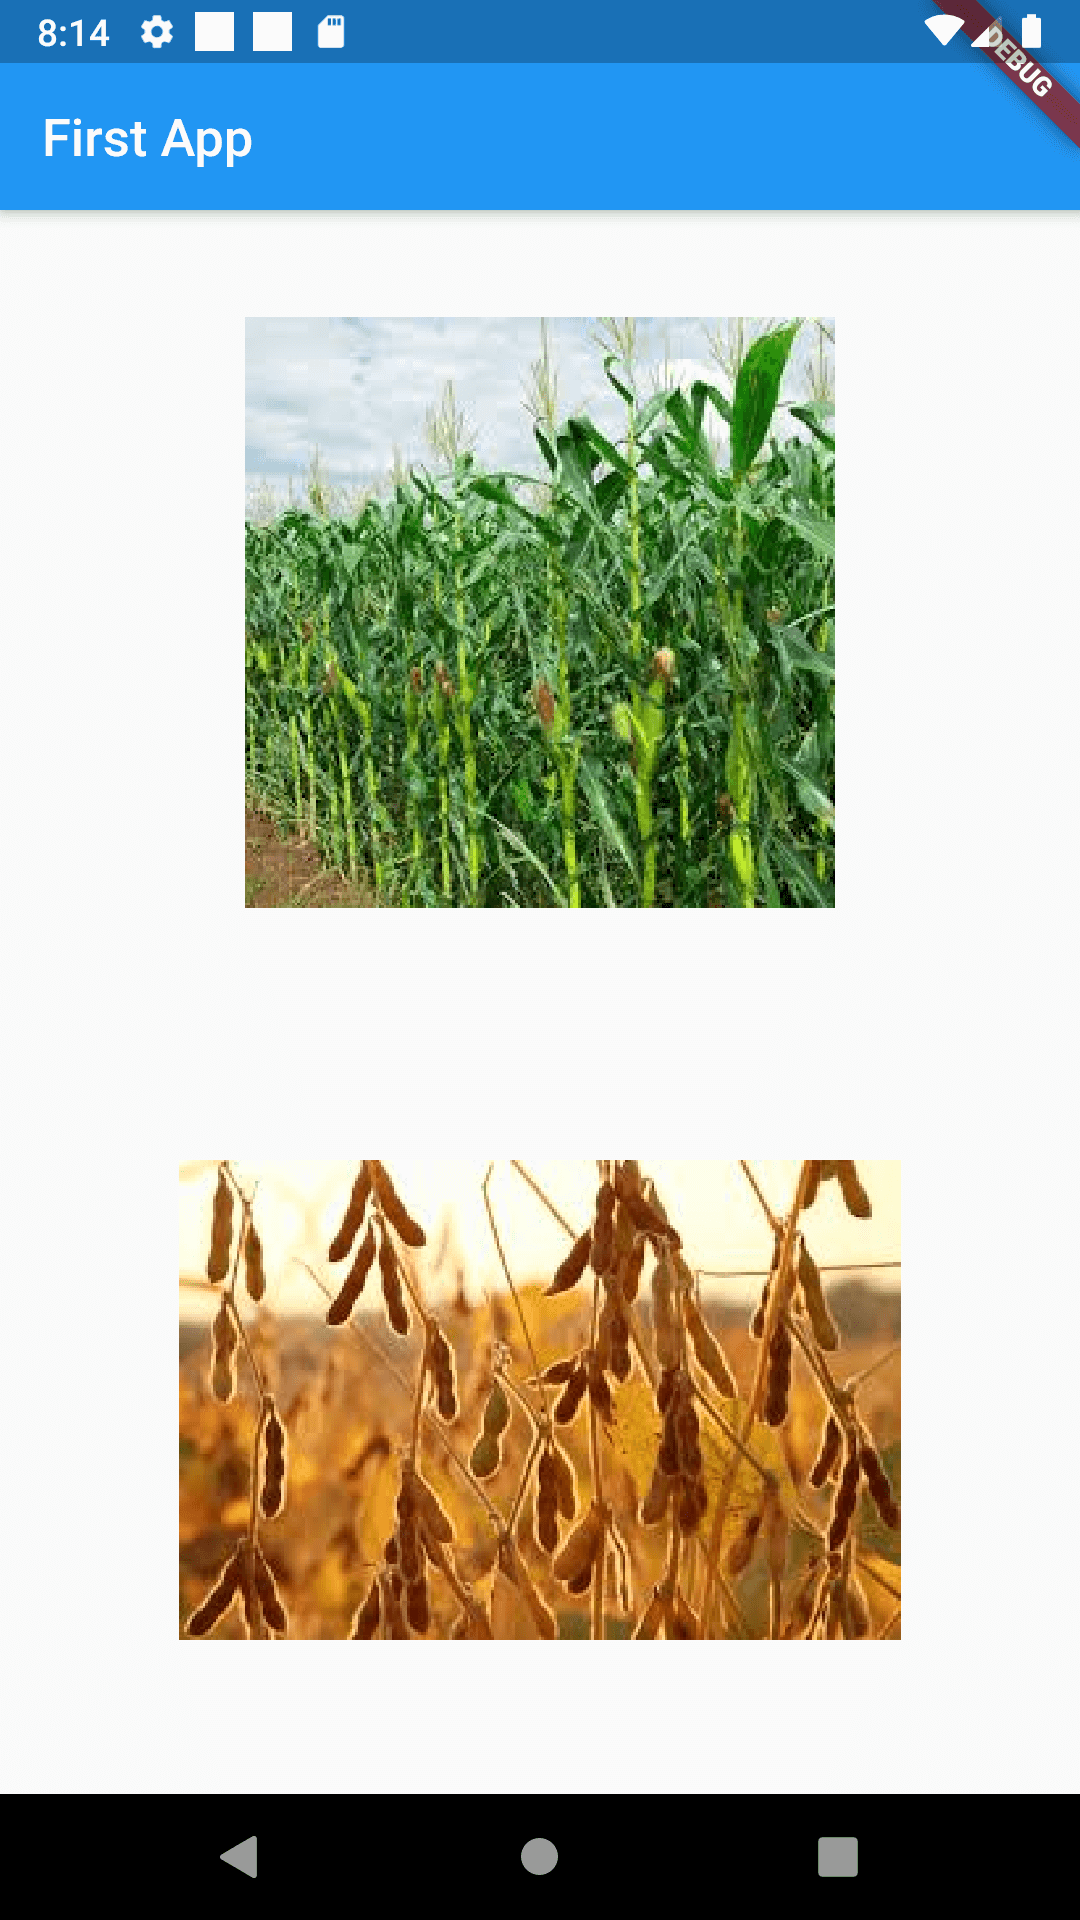
It means debugging is successful without any error. And your App looks like this on the emulator –
To test your App on IOS, you need to install an IOS emulator either using Android Studio or any other Virtual Machine.
Now, we are done with debugging mode also.
5. Publishing
This is the final part of our process. There are different ways to create an “apk” for the App and publish it on Google Play Store. If you want to simply share an app and not looking to publish it on Play Store, write a single line of code in the VS Code terminal –
“flutter build apk”
This will build an apk, it will take some time and you will find it here in the build folder –
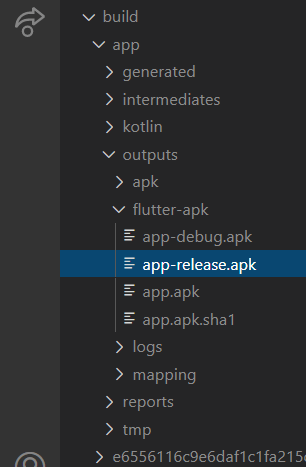
This app-release.apk is the required apk. You can share it with others and they can install it and see what you have made.
To generate an app bundle and publish it on Play Store, do this –
flutter build appbundle –target-platform android-arm,android-arm64,android-x64
This is the way you create an app in Flutter in five steps. You can choose any framework instead of Flutter but the steps remain almost similar.
Conclusion
This article intended to help a complete beginner get into app development and make his very own App. The platforms are many and you should choose according to your requirement and future aspiration in your career.